With watsi connected, ChatGPT reads your workspace and answers with your data: who wrote in, which conversations are still open, which appointments you have. There is no API key to copy: ChatGPT signs in to watsi with your account and you choose what it can do.
watsi is not in ChatGPT's directory yet, so you add it by its URL as a custom MCP server. It takes a couple of minutes.
- 1
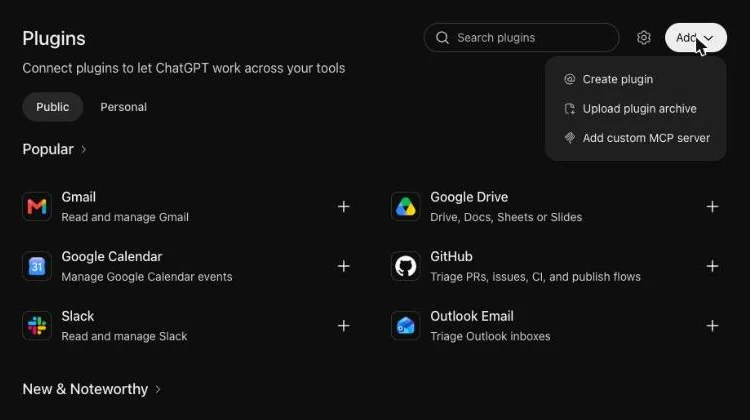
Open Plugins and choose to add an MCP server
In ChatGPT, open Plugins in the sidebar, tap Add and choose Add custom MCP server.
- 2
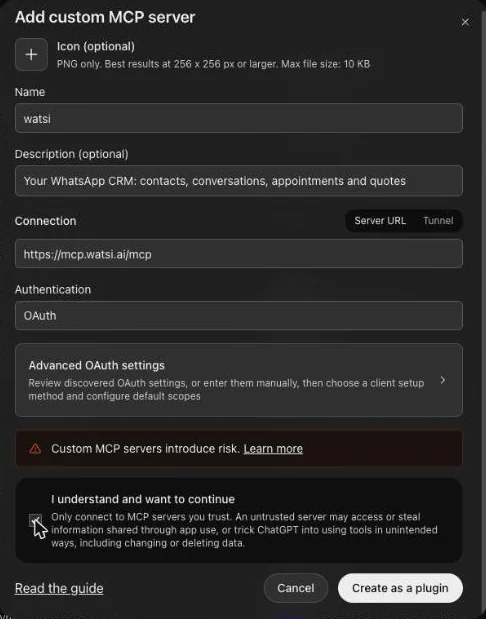
Enter the watsi URL
Name it
watsi, paste this URL under Connection and leave Authentication on OAuth:https://mcp.watsi.ai/mcpTick I understand and want to continue and tap Create as a plugin.
- 3
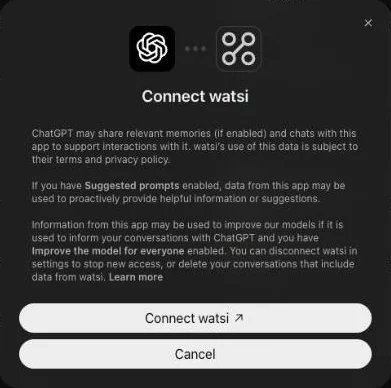
Connect it with your watsi account
ChatGPT asks you to connect the plugin. Tap Connect watsi: watsi's page opens so you can sign in.
- 4
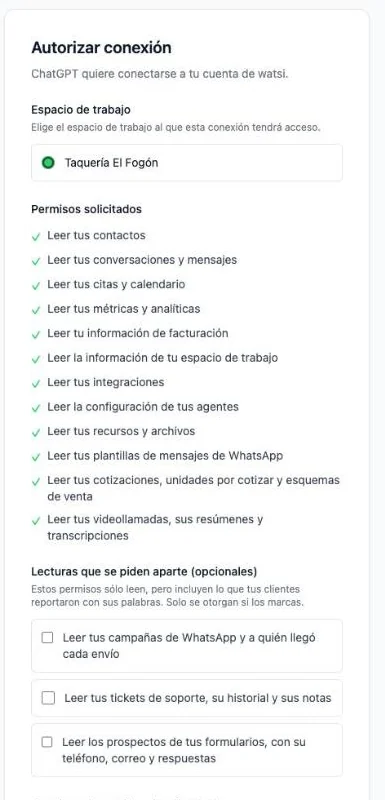
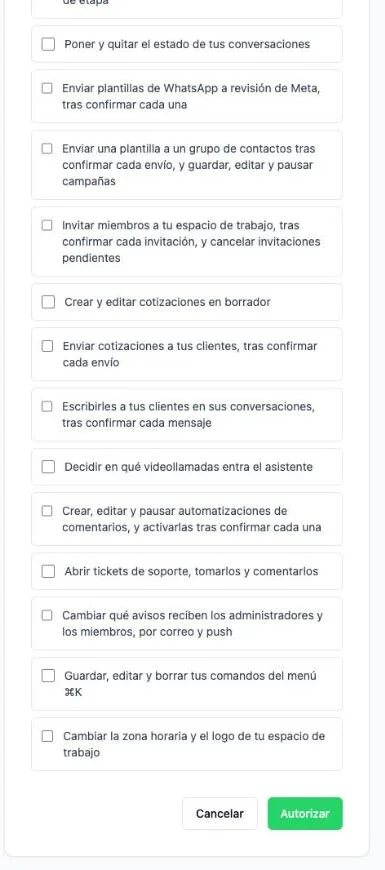
Pick the workspace and approve
On watsi you pick the workspace and see what ChatGPT will be able to read. Reads come ticked. Write permissions come unticked: tick them only if you want ChatGPT to make changes too, such as replying in a chat or sending a quote, and even then every send to a customer asks you to confirm. Tap Autorizar (Authorize).
- 5
Ask ChatGPT
Type
@watsiin a new chat and ask your question.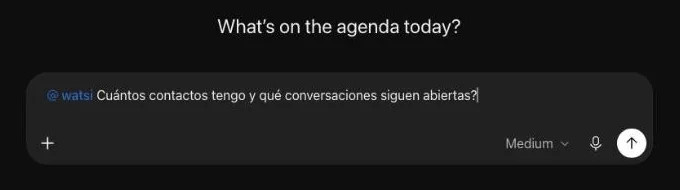
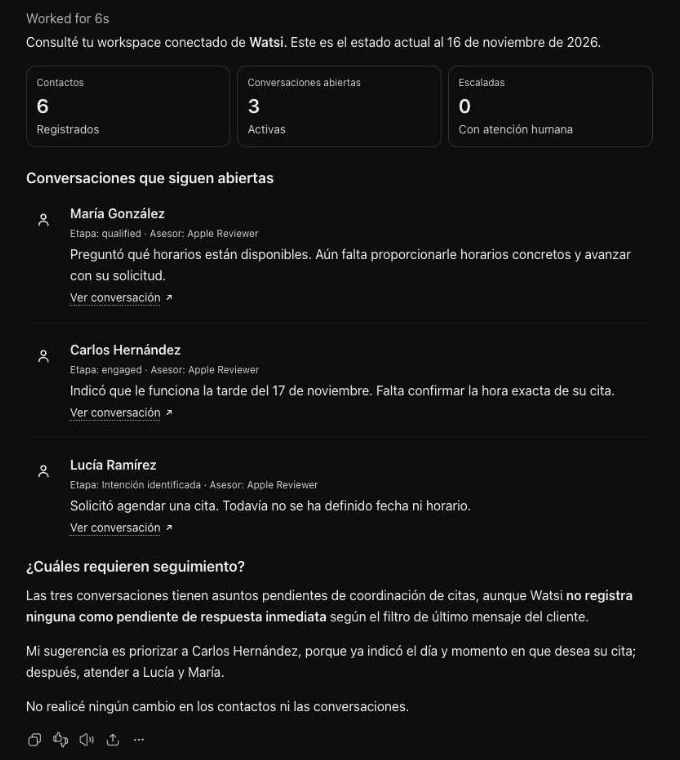
ChatGPT checks your workspace and answers with your data.
If something does not work
- Add custom MCP server does not show up. It depends on your plan and on your ChatGPT workspace settings. If you use ChatGPT at a company, ask whoever administers it to enable custom MCP servers.
- You see another workspace. You connected a different watsi account. On the plugin's page, open Settings, disconnect the account and connect it again.
- ChatGPT asks to reconnect when using a write tool. That action needs a permission you did not tick. Accept and tick that permission on watsi's screen.
What each tool can do and with which permission: MCP server and What you can do.